- English
- French
- German
- Portuguese
- Spanish
- Russian
- Japanese
- Korean
- Arabic
- Greek
- German
- Turkish
- Italian
- Danish
- Romanian
- Indonesian
- Czech
- Afrikaans
- Swedish
- Polish
- Basque
- Catalan
- Esperanto
- Hindi
- Lao
- Albanian
- Amharic
- Armenian
- Azerbaijani
- Belarusian
- Bengali
- Bosnian
- Bulgarian
- Cebuano
- Chichewa
- Corsican
- Croatian
- Dutch
- Estonian
- Filipino
- Finnish
- Frisian
- Galician
- Georgian
- Gujarati
- Haitian
- Hausa
- Hawaiian
- Hebrew
- Hmong
- Hungarian
- Icelandic
- Igbo
- Javanese
- Kannada
- Kazakh
- Khmer
- Kurdish
- Kyrgyz
- Latin
- Latvian
- Lithuanian
- Luxembou..
- Macedonian
- Malagasy
- Malay
- Malayalam
- Maltese
- Maori
- Marathi
- Mongolian
- Burmese
- Nepali
- Norwegian
- Pashto
- Persian
- Punjabi
- Serbian
- Sesotho
- Sinhala
- Slovak
- Slovenian
- Somali
- Samoan
- Scots Gaelic
- Shona
- Sindhi
- Sundanese
- Swahili
- Tajik
- Tamil
- Telugu
- Thai
- Ukrainian
- Urdu
- Uzbek
- Vietnamese
- Welsh
- Xhosa
- Yiddish
- Yoruba
- Zulu
Troubleshooting poor airflow with existing guide vanes in a chicken barn
If your chicken coop doesn't have enough air flow, it's probably not the fans but the guide vanes that are already there. When the Chicken House Ventilation Guide Vane system is working right, it sends air up along the roof, where it can warm up and mix before going down to bird level. When these systems don't work right, you'll notice that temperatures aren't even, ammonia levels rise, and birds are worried. Instead of changing whole ventilation systems right away, guide vane problems need to be carefully diagnosed, which includes checking the mechanical stability and adjusting the angles. Learning how to fix problems with these parts saves a lot of money on operating costs and makes the environment healthy again.


Understanding Poor Airflow Problems in Chicken Barns
The first thing you need to do is figure out the signs of poor airflow. Carefully look around your building as you walk through it. You might see water building up on the walls, especially in areas where wind is usually weakest. The smell of ammonia gets stronger in some areas than in others, which means that air pockets are staying still. Birds may gather away from certain areas, which can show that there are cold drafts or other uncomfortable conditions. These clear signs mean that your Chicken House Ventilation Guide Vane isn't working right, which will affect your whole climate control system.
Common Symptoms of Ventilation Failure
Poor airflow shows up in ways that have a direct effect on how profitable your business is. Too much humidity makes the litter wet, which makes footpad rashes and lung diseases more common. During the warmer months, heat stress makes people eat less and grow more slowly. On the other hand, putting cold air directly on birds in the winter raises their heating costs and makes them very stressed. If the temperature changes between parts of your house by more than 5°F, it means that your guide vanes aren't moving the air around properly. These conditions lower the feed conversion ratios and raise the death rates, which cuts into your profits.
Root Causes of Guide Vane Inefficiency
There are several things that can make a guide vane work less well. One of the most common problems is wrong original sizing. Vanes that are too small for the entry opening cause the air to move too quickly, while vanes that are too big for the opening decrease the throw distance. Misalignment happens slowly as fixing hardware comes loose from being used all the time and being shaken by fans. The buildup of dust from bird hair and feed bits on the vane surfaces changes the way air flows through them.
The structure's stability is compromised by damage from cleaning tools or pests. Installation mistakes, like setting the angle wrong or not closing the sides well enough, stop the best performance right away.Environmental factors are also very important. Extreme changes in temperature make plastic or foam materials expand and contract, which causes them to twist. When materials are exposed to ammonia and high humidity, they break down faster. During storms, changes in wind strength can knock vanes out of place. When the seasons change, the vane positions need to be changed, but many companies don't make these changes, which can cause airflow rates to be too high or too low.
Consequences of Neglecting Airflow Issues
Ignoring air issues leads to a chain reaction of practical problems. Pathogens grow best in still, damp places, so disease attacks happen more often. Your heating bills go up because keeping the floor at the same temperature when cold air is dumping directly on birds requires higher thermostat settings. As a way to make up for poor air flow, fans that run continuously at full speed lose energy. The performance measures of your birds get worse: they gain less weight slowly, lay fewer eggs, and are less uniform across your group.In these situations, the life of equipment is cut short.
When vanes are not placed correctly, they create resistance that makes fans work harder, which eventually causes the motor to fail. The corrosive environment caused by ammonia and hidden moisture hurts building parts all over your place. The cost of labor goes up because employees have to spend more time dealing with health problems, changing settings, and dealing with situations that aren't always consistent. There is a lot of pressure on procurement managers to buy expensive new systems when problems could be fixed for a lot less money with proper debugging and upkeep.
Diagnosing and Analyzing Guide Vane Issues: A Systematic Approach
Instead of guessing, thorough review is the first step in solving problems. Before making any changes, you should start by writing down what is happening now. This standard data helps you see how much things have improved and find trouble spots. Get your repair team together and take a walk through the building when it's normally being used, not just when it's being inspected and systems might be off.
Measuring and Documenting Airflow Patterns
To start, use calibrated tools to take accurate readings. Putting anemometers in different parts of your barn will show changes in speed that show bad distribution. At least ten places, including sides and the middle, should be measured from above at bird level. Write down the weather at these same locations at the same time. Disparities bigger than three degrees mean there are problems with the spread that need to be fixed. Smoke tubes or streamers show visually which way the air is moving, showing if it moves along the roof as planned or drops too soon. Write down the inlet static pressure at different blade sizes.
During minimum ventilation, proper negative pressure ventilation systems usually work with between 0.05 and 0.12 inches of water column. Readings outside of this range mean that the blade needs to be adjusted. To help with future repair, take pictures of the rotor positions and conditions. This paperwork is very helpful when talking about problems with equipment sellers or installation workers, particularly when it involves Chicken House Ventilation Guide Vane systems.
Examining Mechanical and Material Conditions
Problems that measures alone can't find can be seen by touching them. Check the fixing bolts to see if they are loose or rusty. When you fix the guide vanes by hand, they should move easily and not get stuck. In shielded types, check the vane surface for cracks, warping, or separation of the layers. Look for spaces between the vane and the hole in the wall where air can get in without being managed. Your managed air system can't reach these gaps, which lets drafts in and makes the system less effective.
Different types of building show material degradation in different ways. When pressure is put on Styrofoam vanes, they break apart. When UV stability fails, new plastics turn yellow and break. If you don't cover aluminum frames properly, they will rust in places with a lot of ammonia. EPDM rubber seals get stiff and hard, which stops them from sealing airtight. Each of these problems hurts performance in a different way and needs a different way to be fixed.
Analyzing Installation and Configuration Errors
Compare the work to the manufacturer's instructions and best practices in the business. The vane angle has a big effect on the throw distance. For most setups, the angle needs to be 20 to 30 degrees from horizontal during minimum ventilation in order for the ceiling to connect properly. Angles that are steeper raise the speed but lower the throw, while angles that are shorter do the opposite. Instead of guessing, use a digital level or protractor to measure the slope accurately.Check the distance between the different entry points.
When inlets are placed too close to each other, air streams clash, which causes turbulence and an uneven spread of air. When there is enough space between each opening, the air stream can go its full throw distance before it mixes. Making sure the vane's width fits the hole for the airflow—gaps on either side let air flow through that you don't want to. Make sure that the actuator or winch systems work the same way on all vanes. Vanes that aren't in the same place will have different input speeds along the length of the barn.
A chicken farm in Arkansas found that their long-lasting cold-spot problem was caused by vanes that were put in at the wrong angle. The contractor set all the vanes to 45 degrees, which made fast jets that hit birds straight with cold air. When angles were changed to 25 degrees and all inlets were placed the same way, temperature differences across the building went from 8°F to 2°F. This easy fix got rid of a problem that had been going on for several groups.
Optimizing Chicken House Ventilation Guide Vanes for Enhanced Airflow
When you know exactly what's wrong with a system, making focused changes fixes it. Optimization is more than just fixing problems; it also means setting up habits that keep things running at their best over time. Your goal is to make an air system that can adapt to different situations while using the least amount of energy and needing the least amount of upkeep through the use of the Chicken House Ventilation Guide Vane.
Installation Best Practices for Maximum Efficiency
Installing something correctly is the first step toward long-term success. Place the guide vanes so that the air coming in goes toward the middle of the house and up at the right angle. The leading edge should be flush with the inside of the wall, with no protrusions that block airflow. Mounting clamps should be tightly attached to structural parts as well as wall sheathing. Use hardware that won't rust and is made for the barn climate. For example, stainless steel screws will keep things from falling apart because of rust.
Fill in all the gaps around the edges of the vane with weatherstripping that lasts or expanding foam made for farming. These seals stop air from leaking out and going around your controlled entry system. Install vanes so that they are level along their length. If they drop, air won't flow evenly along the hole. Before you finish installing, make sure that the adjustment tools work smoothly across the entire range of motion. Linkages made of cables or chains should always be tight, with no extra slack that lets the position move.
Careful planning is needed to make integration with your fan system work. Based on the standing pressure you want, match the total intake area to the fan's capacity. When inlets are too small, fans have to work against too much pressure, and when they are too big, the system doesn't work as well. Use the method CFM (cubic feet per minute) divided by desirable inlet velocity (usually 800 to 1000 feet per minute) to find the needed square footage of the inlet hole. Spread this area out evenly along the sides to allow cross-ventilation or at the tunnel entrance end for tunnel-mode operations.
Maintenance Protocols That Prevent Problems
Setting up regular repair plans stops most airflow problems before they affect the birds' performance. During production times, when dust builds up quickly, clean the blade surfaces once a month. To get rid of trash without hurting things, use low-pressure water or compressed air. Do not use high-pressure washing, which can damage surface finishes or force water into insulation layers. Every three months, check and fix the mounting hardware because constant vibrations loosen the connections over time.
Follow the manufacturer's instructions for lubricating working parts. Cable winches need to be oiled every so often to keep them from locking. Motorized actuators need to have their electrical connections checked to make sure they work properly. Check the seals for damage and replace them before gaps form. Seasonal changes adapt vane operation to changing weather patterns. For example, winter settings put an emphasis on throw distance and mixing, while summer settings might let higher angles be used to speed up air flow when it's hot.
During cleanout times between groups, do thorough checks. This break lets a thorough review happen without putting pressure on production. Before starting new birds, replace any parts that are worn out. Check automated control systems to make sure sensors correctly change vanes. Adjust the controls so that the positions of the vanes match up with the values of the static pressure. These steps are much cheaper than fixing problems after they happen and hurt the health and performance of birds.
Comparing Ventilation Approaches for Your Operation
Knowing when guide vanes work best and when other methods work better helps you choose the right equipment. Sidewall inlet systems with guide vanes work best when there isn't much air flow and the weather is mild. They do a great job of mixing the air and use pretty little energy because the fans run at slower speeds. When vanes are properly adjusted, they don't need any extra power beyond what's needed for mechanical adjustment because they are passive.
Different types of tunnel ventilation systems use guide vanes, mostly at the air intake end to spread large amounts of air evenly across the width of the barn. When it's hot outside, tunnel mode cools you down the most by directing fast air to bird level. To switch between modes, however, the vanes must be able to be adjusted so that they can move from the least open position to the most open position. Some businesses use combination systems that change on their own based on the temperature and the age of the birds.
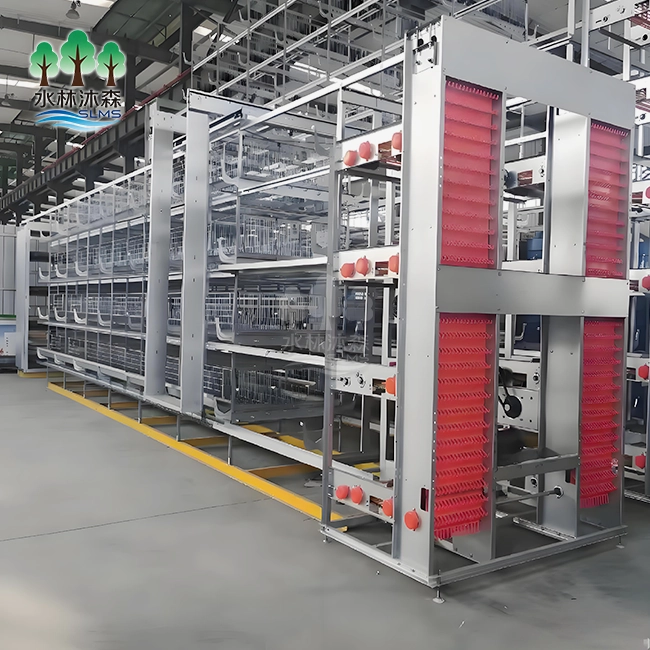
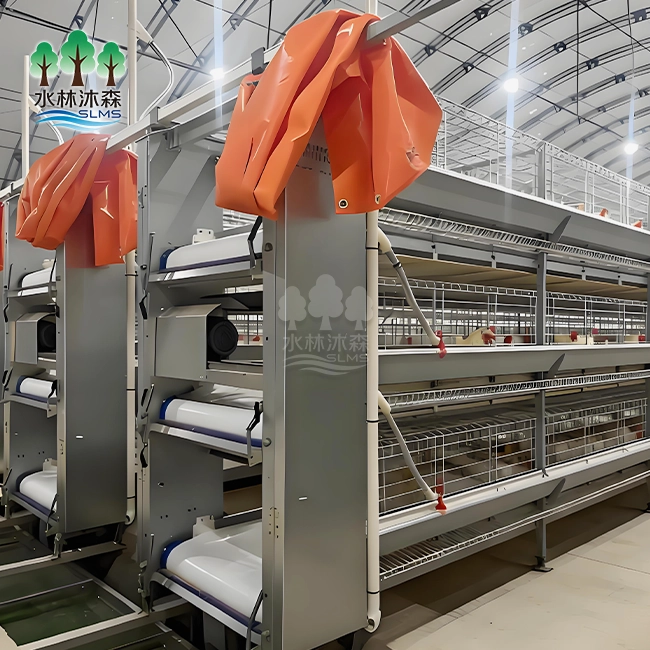
Where you put your exhaust fan affects how your guide vanes work. Negative pressure systems push air through openings, which means that the placement of the vane is very important for proper distribution. Positive pressure systems force air into the barn. They don't need precise entry vanes as much, but they do need well-designed ducts. At Shuilin Musen Aquaculture Equipment, our guide vane systems are 5 cm thick for better insulation, which keeps condensation from dripping onto the litter. Customized measurements make sure that the dimensions fit perfectly with your outlet sizes, removing any gaps that could hurt performance. The aluminum alloy or stainless steel frame design is much more resistant to rust in harsh barn settings than painted steel frames.
Procurement Considerations: Choosing and Buying Guide Vanes for Chicken Houses
Picking the right equipment provider is just as important to the success of your business as picking the right specs. When making B2B purchasing choices, you need to look at more than just the unit price. You're buying a full answer that includes the quality of the product, professional support, installation services, and ongoing help as long as the equipment is in use.
Evaluating Suppliers and Product Quality
Trustworthy makers show their skills by having strong technical skills and a history of success. Look for providers that have dedicated research and development teams that are always making goods better by looking at how they work in the field. Instead of just renaming generic goods, companies that come up with several new designs every year show that they are committed to innovation. Carefully read over the materials they're made of—virgin plastics that have been UV-stabilized last a lot longer than recycled plastics that break easily.
Warranty terms show that the company that made the product is confident in its longevity. Standard warranties that cover flaws for one year are a good starting point for safety, but look closely at what is actually protected. Does the guarantee cover both work and shipping for new parts, or does it only cover parts? When does coverage not apply? Reasonable use standards keep buyers from abusing products and give sellers a way to fix problems that are caused by normal use. After-sales help is very important for fixing startup problems and making the system run better. Suppliers who give expert support through online tutorials, phone calls, and site visits add a lot of value on top of the product itself.
Budget Planning and Cost Analysis
Initial buy prices change a lot depending on the materials used, the level of customization needed, and the number of orders placed. Standard-sized guide vanes made of basic materials may cost $30 to $50 per linear foot. Custom-engineered options made of high-quality materials, on the other hand, cost $75 to $150 per linear foot. Find out how many inlets you need by measuring all the holes in the sidewalls and tunnels that need vanes. Usually, bigger orders get savings for buying in bulk.Think about lifecycle costs instead of just purchase prices. Better vanes that last 12 to 15 years are worth the extra money compared to cheap ones that need to be replaced every three to five years.
Installing things takes work, whether you use your own staff or a professional. Differences in energy efficiency affect ongoing operational costs. For example, vanes that work properly cut down on fan usage and heating fuel use. Maintenance needs depend on the material and how complicated the design is. We offer reasonable quotes for a wide range of jobs, from remodeling a single home to building a whole farm. Custom size gets rid of the need for field modifications and makes sure that the product fits and works perfectly. Our one-year guarantee covers problems with the materials and the way they were put together.
Value-Added Services That Ensure Success
Professional installation services get rid of the risk of mistakes and confusion that could hurt performance. Technicians with a lot of experience know the right angles, spacing, and closing methods that have been developed over hundreds of installs. They get the job done quickly so that it doesn't get in the way of your operations. Professional maintenance often saves a lot of money in the long run, even though it costs more up front. We offer on-site construction services by trained professionals who know how to work with different types of barns and air systems. With regular checks and preventative maintenance, long-term maintenance plans give you peace of mind.
These tasks are better done by technicians who know how to work with your unique equipment than by general repair staff. Some sellers offer remote tracking tools that can let you know about changes in performance before they become a problem with production. By teaching your repair team the right way to change and fix problems, you can handle more problems yourself and not have to call outside help as often. As-built drawings, operation manuals, and repair schedules are all part of documentation packages that help with both present operations and choices about future equipment, especially when dealing with Chicken House Ventilation Guide Vane systems.
Troubleshooting Checklist: Quick Guide to Improve Poor Airflow
Systematic problem-solving keeps people from wasting time and money on fixes or replacements that aren't needed. This list walks you through the steps of diagnosis in a way that makes sense, from making easy observations to taking precise measurements. Instead of jumping to conclusions based on first views, go through the things one by one. Many problems with airflow are caused by more than one thing, so they need to be fixed together.
Step One: Visual Inspection Protocol
Walk through your building when it's normally open and look at how the birds are behaving. Clustering away from certain places means that there are drafts or uncomfortable temperatures there. Check all of the vane's sides for damage that can be seen, dust buildup, or changes in shape. Gently pulling on the vanes will show you if the fixing clamps are loose. If they move, the hardware needs to be tightened. Check the seals around the sides of the vane for holes, damage, or loss of tension. Check for things like equipment, feed lines, or trash that are blocking airflow paths near the holes where air comes in.
Step Two: Measurement and Documentation
Use a manometer or differential pressure gauge to record the standing pressure in more than one place. The standard minimum airflow ranges from 0.05 to 0.12 inches of water level. At bird level, check the air temperature in six to ten different spots around the barn. Use a facility diagram to find trends in these data. Check the speed of the air at each opening by using an anemometer. When all the vanes are set the same, results should be the same for all the openings. Take pictures of the vane positions and situations to use as a starting point.
Step Three: Adjustment and Testing Sequence
Start with the easiest fixes and work your way up to more difficult ones. Tighten any loose attachment hardware and see if that stops the position shift. Clean the vane's sides and the area around them of dust and other debris. Gradually change the blade angles and check the airflow after each change. Most things get better when the slope is between 20 and 30 degrees from level. Use the right weatherstripping materials to fill in any holes around the edges of the vane. Check that all the vanes along a panel stay in the same place—inconsistency can cause problems with distribution.
Step Four: Determining Replacement Needs
In some situations, parts need to be replaced instead of being adjusted. Cracks that go through the length of the blade weaken the structure and make it less insulating. If the warping is more than 0.5 inches from flat, it stops the seals from working right and lets air flow through. When something is so flimsy that it breaks apart when you put pressure on it, it means that it has degraded further. When actuators or winches stop working or can't stay in place under normal running pressure, they need to be replaced. When the cost of fixes gets close to 60% of the cost of replacement, it makes more financial sense to buy new tools.
If the problems don't go away after basic fixing, you should contact technology experts. Engineering knowledge is needed to solve complicated problems like system design, not enough capacity, or integrating with building technology. Suppliers like Shuilin Musen Aquaculture Equipment offer expert help to figure out what's wrong with complicated issues. Monitoring tools that are based on data allow for proactive management instead of reactive problem-solving. Through trend research, these technologies find problems before they cause production losses. Putting money into tracking infrastructure pays off because birds do better, there is less work to do, and equipment lasts longer.
Conclusion
If your chicken barn doesn't have enough wind, fixing the problem with the guide vane will make the birds healthier and your business run more smoothly. Systematic diagnosis finds the root causes of problems instead of just the signs. This is true whether the problems are caused by broken parts, mistakes in installation, or poor upkeep. Using optimization techniques, such as the right way to put things and doing regular upkeep, stops problems from happening again and again and makes equipment last longer.
Smart purchasing choices weigh the short-term costs against the long-term benefits, taking into account the quality of the product, the help from the provider, and the full range of services available. Monitoring and making changes to your air system on a regular basis will keep it working at its best in all kinds of situations and production cycles, especially when using a Chicken House Ventilation Guide Vane system. These steps will protect your investment and give your birds the stable setting they need to do their best.
FAQ
How often should guide vanes undergo maintenance inspection?
During production times, we suggest checking the ventilation vanes every three months and cleaning and adjusting them completely between groups. When the seasons change, especially when going from summer to winter or back again, the vane angles need to be checked more often to make sure they are still the best they can be. Barns that get a lot of dust may need to be cleaned once a month to keep it from building up and blocking airflow.
Can guide vanes completely replace exhaust fans in ventilation systems?
Guide vanes work with motorized ventilation devices, not instead of it. They guide and spread the air that comes in from exhaust fans' negative pressure. Vanes that are properly set make fans more efficient by making sure air flows in the right direction, but fans are what move the air. The mix provides climate control that uses little energy for a wide range of industrial needs.
What signs indicate guide vanes need replacement rather than adjustment?
Damage to the material, such as cracks going through it, lasting twisting that is more than half an inch, or brittleness that makes it fall apart, means that it needs to be replaced. Problems with performance that don't go away after proper adjustment and cleaning are signs of material degradation. Mounting systems or adjustment methods that don't work and can't be fixed for a reasonable price should also be replaced completely.
Partner With a Trusted Chicken House Ventilation Guide Vane Supplier
Getting reliable tools made for tough agricultural settings is the first step to getting the best temperature control for your chicken coop. Shuilin Musen Aquaculture Equipment Co., Ltd. has been helping large-scale chicken farms in a wide range of temperatures for eight years as a trusted Chicken House Ventilation Guide Vane provider. Our handmade guide vane systems have frames made of aluminum alloy or stainless steel that don't rust and last much longer in tough barn conditions than standard options.
The 5cm of insulation keeps condensation from forming and directs wind exactly where it's needed. We help you succeed by offering a wide range of services, such as installation guides, on-site setup help, and quick technical support at wangshuaislms@gmail.com. Our one-year warranty protects your investment, and our tech team is always ready to help you get the most out of your system. Get in touch with us right away to talk about your specific air problems and find custom solutions that will save you money on energy costs and make birds happier. You can find full specs and case studies at slms-equipment.com. These show how the equipment has worked in situations like yours.
References
1. Donald, J. (2018). Poultry Housing Environmental Control Systems: Design and Management Principles. Agricultural Engineering Press.
2. Purswell, J.L., & Dozier, W.A. (2019). "Air Velocity and Temperature Distribution in Broiler Houses with Different Inlet Systems." Applied Engineering in Agriculture, 35(4), 567-578.
3. Czarick, M., & Lacy, M.P. (2020). Poultry Ventilation Management: A Practical Guide for Commercial Operations. University Cooperative Extension Publications.
4. Gates, R.S., et al. (2017). "Computational Fluid Dynamics Assessment of Sidewall Inlet Performance in Tunnel-Ventilated Broiler Houses." Biosystems Engineering, 159, 145-159.
5. Baxevanou, C., Fidaros, D., & Bartzanas, T. (2018). "Numerical Simulation of Airflow Patterns in Livestock Buildings: Application to Poultry Houses." Agricultural Engineering International: CIGR Journal, 20(2), 103-114.
6. Liang, Y., Xin, H., & Wheeler, E.F. (2019). Advanced Environmental Control Technologies for Modern Poultry Production Facilities. American Society of Agricultural and Biological Engineers.
Learn about our latest products and discounts through SMS or email